Tuesday, February 8, 2011

The Comfort of Indian Food - Channa Masala and Puri

Let's play a game. You tell me which one of the following does not belong in Texas: horses, oil, Tex-Mex, snow, Piyusha.

I'll give you a minute to ponder. I'll even give you a hint with the next picture :)

That's right folks.. SNOW does not belong in Texas... and yet, there it was in all of its white glory. Did I make a snowman you ask? I would have but the hubster is a New Yorker and therefore the authority of snow and told me "It's not the right kind of snow... it won't pack." HMPH!

After 4 consecutive days of being trapped at home, I was going crazy! I couldn't look at the assorted cans of beans and jars of pasta without feeling eich... What to do what to do?

I decided today was the day. I could feel the planets aligning in my favor. I was going to face my arch-nemesis cuisine - Indian (pause for suspense music). I know what you are thinking.. Piyusha, aren't you Indian? I mean you got that whole UPS "What can brown do for you?" thing going. But Indian food is different than a lot of cuisines with the call for a perfect balance of spices and understanding how each spices adds a different dimension and layer to your final product. It also doesn't help that the typical Indian mom/auntie explains measurements with "just add one finger worth."

I decided to tackle channa masala (aka chick pea curry) and puri - fried dough that puffs up in little clouds if done right. My close friend Pooja will tell you that channa masala and I are not bffs4eva... Don't get me wrong, I love chick peas... hummus, curry, in a salad.. yum. Cooking them Indian-style is another story. Poor Pooja, who loves me very much, has eaten many failed attempts at channa masala over the course of a decade. Poojie, this one's for you.

My puri puffed up perfectly! My mother will be so proud!

So, where's the picture of the final product? Guys, it was so delicious, I went back for 2nds... ok fine, 3rd and realized it was all gone before I took a picture... My bad.


Now it's time for you to conquer your fears! Or perhaps, you're now craving Indian food... Here ya go!
Ingredients:

For the Channa Masala -

2 tbsp of oil

1 small or 1/2 medium white/yellow onion finely diced

1/2 jalepeno pepper (or 2-3 Indian green chilies, I didn't have them on hand)

3 tbsp of canned diced tomatoes or 1 medium fresh tomato diced or 2 tbsp of tomato paste

1 - 15 oz can of chick peas aka garbanzo beans, drained and rinsed

1 tsp of garlic, finely minced

1 tsp of black mustard seeds (rye)

1 tsp of fennel seeds (jeeru)

1 tbsp of coriandor

2 tsp of cumin

1/2 tsp of cayenne (adjust to taste)

1 tsp of turmeric (halder)

1/2 tsp of salt

1.5 tbsp of lemon juice

1 cup water (you may need more)


The "How To" -

1. In a medium pot, heat the oil and add in the mustard seeds and fennel seeds

2. Once the mustards start popping (be careful! They do fly!) add in the onions, garlic and let cook until the onions are almost translucent

3. Add in the tomatoes and add in the spices (coriander, cumin, turmeric, salt, cayenne). Mix around until the ingredients become a paste-like consistency

4. Add in the chick peas and stir around

5. Add in the lemon juice, stir

6. Using your large spoon, mash up some of the chick peas (just about 1/5 of the pot) so the starches can make a gravy

7. Add in the water and cook covered

8. Check after about 10 minutes, stir around, add in more water if needed. You are looking to make sure the chick peas are tender and flavor full and the gravy is thickening

9. Once the chick peas are cooked, you may need to add in a little more water at this point, cook uncovered for about 5-10 minutes, basically until the gravy is no longer watery


For the Puri -

Ingredients -

1 cup of durum wheat flour (I used the Golden Temple brand from the Indian store) - the wheat flour you find in normal shops doesn't work - trust me, I tried

1/2 tsp of tumeric

1 tbsp of oil (vegetable or EVOO)

1/2 tsp of salt (adjust to taste, I prefer less salt)
1/2 tsp of cayenne (again, adjust to taste)
1 cup of water but you may not need all of it
a bowl of extra flour on the side
1 cup + of canola or vegetable oil depending on your fry pan
The "How-to" -
** Heat your fry pan with oil before starting
1. Mix all the ingredients, except the water. Your dough should be loose crumbs
2. Add in the water as needed to make a soft, loose dough
3. Divide the dough into small 1 tbsp dough balls
4. Dip them in the extra bowl of flour so they don't stick to your rolling pin and roll them out into 3" diameter circles. Make sure they aren't too thick because they won't puff up
5. Take a small piece of dough (just a tiny piece) and drop it in the oil to check if it's ready. If the dough starts bubbling up and floats to the top, your oil is ready. If it sinks and does nothing, the oil is too cold
6. Make sure you are all step up before you start frying your puri. I place newspaper on a plate so the excess oil will be soaked up from the fried puri
7. Drop your puri in the oil and using the ladle, push the puri back in as it floats to the top, this will help it puff up. Should take about 20-30 seconds, flip for another 10 seconds and remove from oil and place on your newspaper or paper towels
8. If your oil starts smoking or if your puri cook (turn golden brown) before they puff up, your oil is too hot. Reduce the heat and wait a couple of seconds before proceeding
Done and done! Finally, after years of attempts, it worked.. I'll remember to take more picture next time. It was just soo good!
Hot Indian food was just what I needed for this very non-Texas day :)


Tuesday, December 21, 2010

Booze-a-Palooza

As you can probably tell I'm obsesses with baking right now... I thought I found my niche but then the Great Pumpkin Disaster happened. *sigh* But then! A revelation! At work we took personality assessments and it clicked... I'm not a great combo for baking - low patience but high detail... well.. I'm going to my self-awareness to work!

The hubster and I have a lot of fun friends... this year we were invited to several themed holiday parties... one being Booze-a-Palooza. Well who am I not to contribute? I decided to get created with Bakerella's cake pops and make little beer mugs. Learning from my previous mistake of adding too much frosting (this is when I attempted to make longhorn shaped cake pops for the UT/OU game... that disaster was more of a defeat which is why I didn't share).. I took leftover cupcakes and crumbled all but 3 in my food processor. This way, if I've added in too much frosting, no biggie, I had cake reserved to help balance it out.

TIP: The consistency of your cake should feel like dough... For 1/2 a 9 x 13 cake, I use about a 1/4 of the container of frosting.


After I made my "dough" I used a cookie dough scoop to make 25 equal shaped balls. I pushed them through a one inch flower shape cookie cutter and kept the top part round. That would eventually be the "beer foam" part of beer mug cake balls.


After I had all my cake balls shaped, I put them in the freezer over night.
Day Two: I got a bunch of chocolate covered pretzels as a gift at a holiday party, so I just used though. Using a knife, I "sawed" the curved part of the pretzel to be the handles on the "beer mugs." I glued them on using Wilton peanut butter flavor candy melts. You just need about 5-6 discs for this step. If you are planning on coating them, then melt more.


Day 3: Dipping... so when in my first attempt at cake balls this is when this fell apart (literally). So I wanted to go very slow. I decided to make two flavors of cake balls - Wilton peanut butter candy melts as "golden ale" and Wilton dark chocolate candy melts as "Guiness." Before dealing with melting the chocolate, move the cake balls from the freezer to the fridge.
Reading a ton of reviews online, here's how I melted the chocolate for a smooth consistency:
(I use about 8-10 oz and a pretty shallow bowl)
1. Place candy melts in a microwave friendly glass bowl (I heart Pyrex)
2. Defrost the candy melts for about 30 seconds, stir and then defrost for another 30 seconds
3. Add in about 1 tsp of vegetable shortening OR, if you have it, 1 tsp of paramont crystals
4. Melt in the microwave for 15 seconds, stir, 15 seconds, stir, etc... until smooth
5. Place the glass bowl over boiling water (as a double boiler)... turn off if it starts getting too hot


Take out 2-3 cake balls from the fridge, leaving the rest, take your stick, and dip it in the chocolate, insert it into the mug (make sure you don't push all the way through!) Wait about 15-20 seconds for chocolate melt to harden.
Dip your cakeball into the chocolate and don't swirl! Just rotate the stick until the entire ball is coated. Lift out and tap, while rotating the stick, to let the excess melt drip off.
Since my mugs had a lot of nooks and crannies, I took a toothpick and "scraped" out the excess melts so you could actually see the shape and handle on the pop.

Now for the "beer foam" on top I used Wilton candy sprinkles in white. Along the theme of Booze-a-Palooza, I actually found that a shot glass was the perfect height and had the best diameter for dipping my beer mugs into the sprinkles without making a mess.
After I got the hang of it, I was able to move quickly from scraping the excess chocolate and dipping into the sprinkles. For my first initial ones, where the chocolate harden before I had a chance, I just redipped the top part and then dipped into the sprinkles. I doubt anyone will complain about an extra layer of chocolate!

They ended being a huge hit!! Who says cake pops have to be round??

Friday, December 3, 2010

Merry Christmas to Meeee

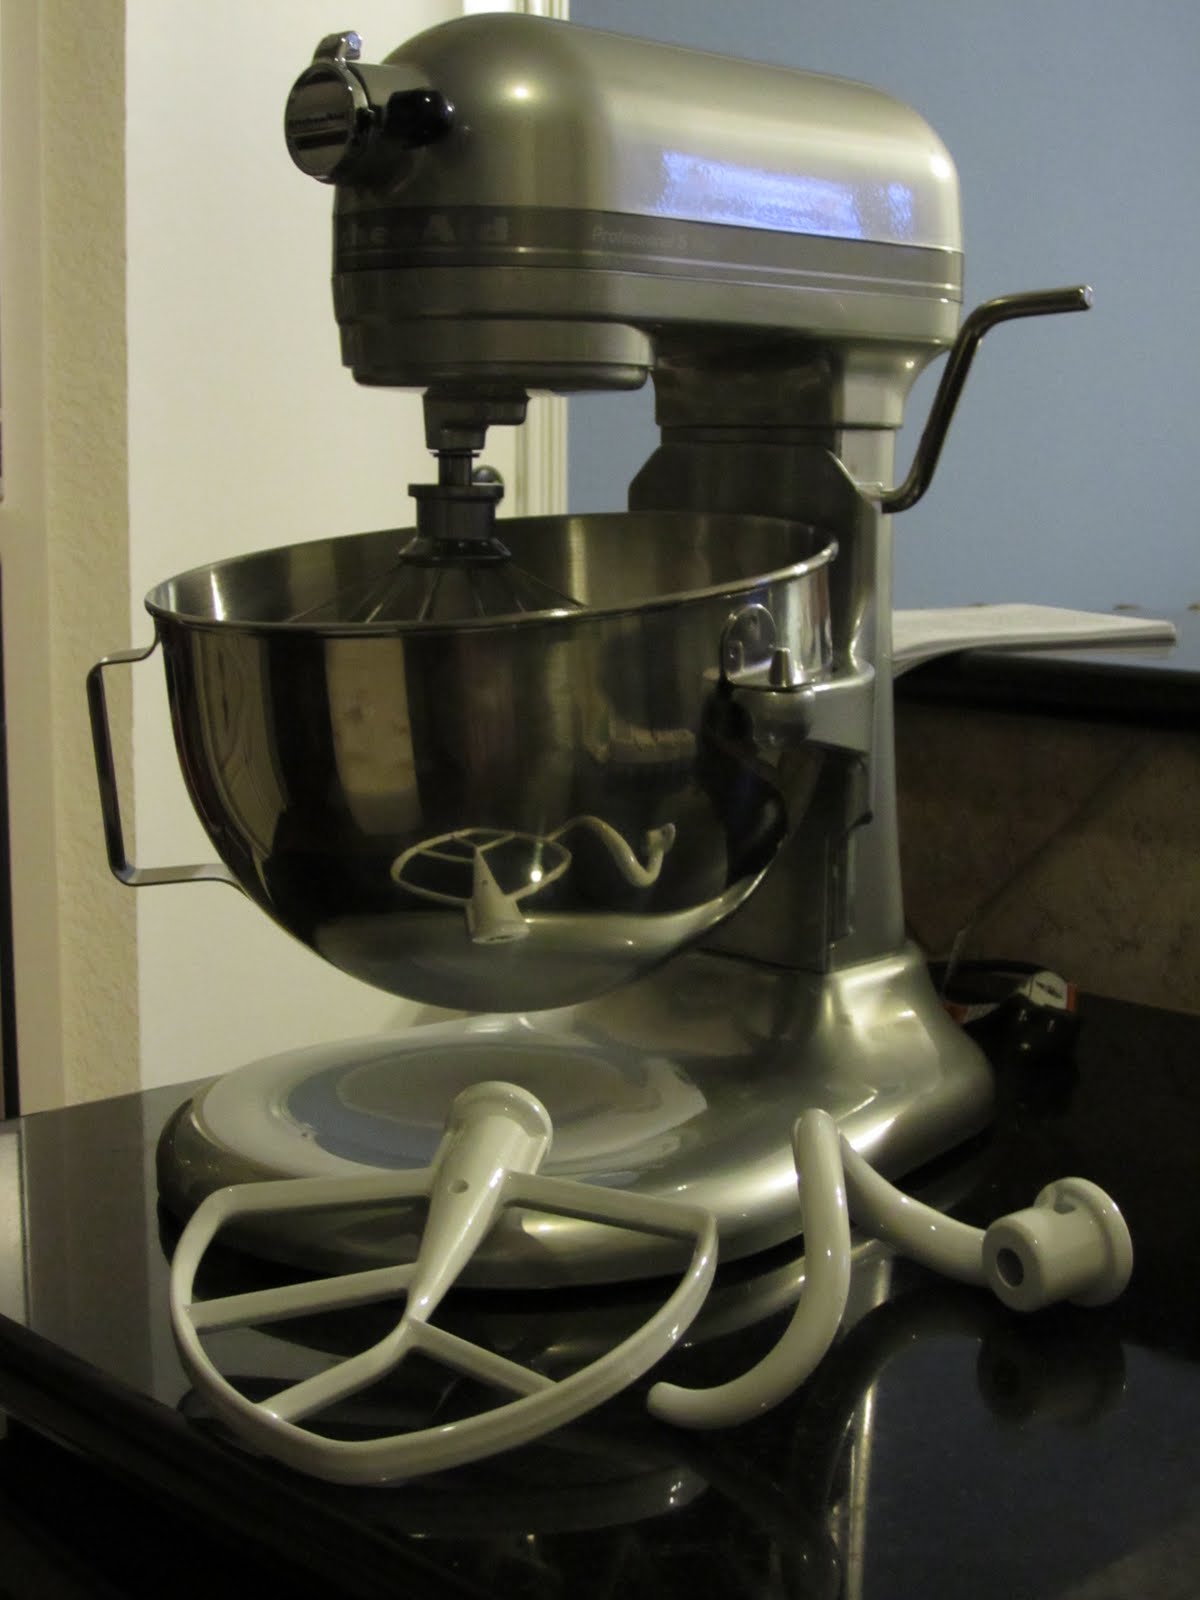
Some people want their two front teeth for Christmas.. Others want the latest fancy gizmo with blinking lights. Not me, I've never been much of a technie. If it was up to me, we'd still be playing 2-D Super Mario Bros. where yes! you do need a running start to jump over the gap and Ms. Peach is waiting for me to school King Kroopa to get her to grab a shake (which has yet to happen). I've never really needed the "latest and greatest" of anything until my cake decorating class. After the 4 a.m. Great Pumpkin Disaster that involved many initimate hours with my hand mixers, it was time to graduate to the big leagues... investing in a countertop stand mixer... and not just any mixer! I was going to join the elite group of bakers (in my mind of course) and get a Kitchenaid Mixer! (Please imagine me onto of a cupcake with the theme of Superman playing in the background)

You know when the big box came, I was going to open it. Pshhh... I'm on the forefront of a generation of instant gratification... Santa can leave me a lump of coal on Christmas morning.
So what was I going to make?? I mean this was the kick-off to many many years of mixer explosions... err.. success ahead! I decided to start of with a good ol'chocolate chip cookie :)
Look at that! No flour on my counters! No gooeiness leaking! And best of all, no Zack Morris bang wave due to shortening in my hair!


Ok I didn't take picture of the end results mostly because 5 were consumed right away. I couldn't control myself... My inner Cookie Monster was released! But they were delish!
What you'll need:
1/2 cup of granulated sugar
1/2 cup of brown sugar (make sure you pack this down tight in the measuring cup)
1/2 cup of butter or margarine (softened at room temperature)
1 tsp of Pure Vanilla
1 egg
1 tsp of baking soda
1.5 cups of flour
6 oz of chocolate chips
The "How-to":
1. Beat the sugars, butter and vanilla for about 2 minutes; pre-heat your oven to 375F
2. Add in the egg and beat in about 30 seconds
3. Gradually add in the flour and baking soda, mix for about 2 minutes of medium speed
4. Add in the chocolate chips and beat for another 30 seconds (until well incorporated, should be less than a minute)
5. Using a small scoop or a tbsp, place the balls of dough about 2 inches apart on a cookie tray
6. Back for 10-12 minutes, cool and enjoy!


Monday, November 22, 2010

The Great Pumpkin (Disaster) Cake


I love the holidays... I mean what's not to love? Fabulous friends, tons of parties, mounds of food and convincing yourself that the holiday calories don't count. I love wandering around Michaels, Joann's... Target... William Sonoma (you know I have a shopping addiction) and buying things that I know will make me cook and bake just like the Food Network stars and the awesome bloggers I read about... which brings me to my latest kitchen adventure. The Great Pumpkin Cake *insert suspenseful music*

Every year the hubster and I attend a friend's Thanksgiving potluck and every year, I search high and low for that perfect recipe. One that will ensure that I leave with an empty platter/bowl confirming that "YES! You brought something so delicious that we ate it right up!" Three years ago, the mashed potatos with corn combo (I swear at the time it sounded like a good idea) was not a huge hit... Last year's veggie meatballs went over pretty well. This year... this was going to be the year I take on dessert *GASP*... you know it had better be good.


I decided that after 3 cake decorating classes under my belt I was a true baker (Top Chef: Just Desserts look out) and I was going to take on a multi-layer cake. I found a recipe for the structure of the cake off bakerella.com (Just to avoid torting the cake, I used multiple cake pans) and a pumpkin cake and cream cheese frosting recipe on allrecipes.com. I gathered everything I needed... whirled the mixer for a power check. "How long do you think this will take," asked the Hubster with curiosity. My response: 5 hours.


And yes, that's how long it took me. I started at 11 p.m. (after a night of bowling and kicking the hubster's butt with a score of 94 boo yah!) and I finished at 4 a.m. Why you ask? No, it wasn't the adreline high from bowling. If you know me, you know caffeine and I are frenemies. I drank soda and sleep just wasn't happening. The hubster says it's psychological and to that I say "pshhhh.." Back to the cake.
It started off well... see:

Then around 3 a.m. it started sliding south... literally:


At 3:30 a.m. I decided to peel my cake apart and try again (do not attempt at home).

Finally around 4 a.m., as I finally came up from the well of frosting and powered sugar to look around my kitchen that was splattered with various baking essentials, I threw in the towel... but not before I thought adding graham craker crumbs would be a nice touch:


I took The Great Pumpkin Cake to the putluck and prayed you could see the layers... YES! YES YOU COULD!


It was a success! Gosh it was really yummy!
And even though I took 1/2 of it home, my co-workers were than happy to step in and finish the job.
Happy Thanksgiving!

Friday, July 2, 2010

The Risotto Challenge!

Ever have one of those rare, wonderful days where everything goes right... you get your work done on time so you're out when there's still day light... there are no misplaced "to-do's"... You didn't leave the AC running all day for the millionth time since you moved in... Yeah, today was definitely not one of those days. My work list never seems to end... *sigh* I resorted to Taco Bell for lunch (yes, that's right.. don't judge me.. Yo quiero Taco Bell)... and even though I didn't leave the AC running (go me!).. it just wasn't one of those days that one would feel inspired to make anything.

So I went to my current happy place... The library (don't worry Target, you are a super close second). Yes, that's right... I heart the library... never again will I buy a book only for it to collect dust under my bed. Rather, I will do a test run... I love walking up and down the aisles looking for my next adventure. Yes, that's right I am a library fiend. Some things never change...
I came acoss a book that made me a laugh, titled "Girls can't cook." I looked in the appendix for "asparagus" thinking about the pound of sprouty greens I bought last week that are nearing that inevitable turning point sitting in my fridge. There.. *cue the chimes*.. was a recipe for asparagus risotto! Inspiration! A recipe I had meaning to try forever but got intimidated each week when I watched contestants on Hell's Kitchen fail to make it to Chef Ramsey's expectations. Eh... Let's give it a shot shall we?


(Btw... when the hubster found out I was going to attempt to make risotto, he decide he would play the role of Chef Ramsey, explicits and all...).


I called my friend Vaishali for some "lessons learned" since she's made risotto several times. I realized that this cooking process was going to definitely test my patience level, but I digress... Let's move on to my latest cooking adventure..


Asparagus and Mushroom Risotto


What you need (for 4 servings):


  • 4-5 cups of vegetable stock, boiled
  • 1 cup of medium grained rice, rinsed
  • 1/2 lb of asparagus, stems broken off and chopped
  • 1 medium white onion, diced
  • 1 cup of mushrooms (the store didn't have any decent ones, so I used can mushrooms), chopped
  • 3 tbsp of chives, chopped
  • 3/4 cup of white wine
  • 3-4 tbsp of EVOO
  • 1 cup of grated Parmesan cheese
  • 2 tbsp of butter

The "How to" -

  1. In a small pot, boil the vegetable stock, covered so it doesn't evaporate on you
  2. In a larger pot, heat the EVOO, make sure it coats the bottom of the pan well
  3. Add in the onions, cook for about 5 minutes, till they are clear
  4. Add in rice and cook until rice most of the rice is transparent, make sure you are stirring frequently (this takes awhile so be patient)
  5. Add in the wine, stir frequently and until all the moisture is absorbed
  6. Add in a 1/2-1 cup of stock, until the rice is covered, at time. This step (repeated 3x) requires a lot of patience and upper arm power (lots of stirring is required). Let the rice absorb the stock, it should be a slight soupy consistency before adding another cup or so of stock, again, covering the rice
  7. Before the 3rd cup of stock, add in the asparagus and mushrooms, make sure the asparagus gets tucked in so it does have a chance to cook
  8. Let the 3rd cup of stock absorb, again a slightly soupy consistency. Do a taste test... it should be al dente
  9. Season with salt and pepper to taste
  10. Turn the heat off and add in the 2 tbsp of butter and the cheese. Mix well
  11. As you are mixing the butter and cheese, this will help the soupy consistency of the rice become creamy and the rice should be cooked now.

Can I just say, for my first attempt at risotto, this was D-E-L-I-S-H! Definitely be more mindful of making sure the rice is covered with stock at the beginning of each pour. Also, making sure the rice is transparent prior to the stock is key in making sure the rice is in fact "al dente" and not just plain uncooked rice.

Happy cooking!


Monday, June 28, 2010

Easy Peasy Pizza


I'm back! It's been a long long time since I've shared my cooking adventures and due to popular demand (ok my 3 followers), I have returned! Don't worry, just because it wasn't posted here, doesn't mean the cooking has stopped! The hubster and I finally bought a house... meaning there's ample counter space for happiness to occur :)
So I have a love-hate relationship with Sundays... on one hand, *sigh* it's a great day off... hardly ever have plans, do my errands, lounge on the couch, catch up with my 2nd love (the hubster being my first)... my DVR (I love reality competition shows and ABC Summer Season). But at the same time, Sunday means that Monday is just around the corner... I think of the laundry list of things I meant to get done but just didn't quite make it... eh, I technically still 3 more days to return that impulse buy before the 30 days is up :) Really the last thing I want to do after a weekend of play time is spend the last wee moments of my weekend in the kitchen.


So I came up with this super quick and easy (and so super yummy) pizza pie... It has a great balance of oozy cheese and your veggies... Fondue lovers beware... you may fall in love all over again ;)


What you need:

  • pizza crust (I cheated and bought the ready made kind)

Cheese Sauce


  • 2.5 tbsp of margarine

  • 2.5 tbsp of flour

  • 1.5 cups of milk (this may vary)

  • 2 cups of shredded mozzarella cheese

  • garlic powder

  • pepper

Toppings


  • red crushed pepper

  • broccoli

  • sun-dried tomatoes

  • chicken - seasoned and cubed (optional - I put this on my husband's half)

  • Morning Star "Chik'n Strips" - seasoned and cubed (optional - I put this on my half)

  • EVOO

  • Grill seasoning

The "How To" -


  1. Pre-heat oven to 350

  2. You'll start off by making a basic roux. Melt the butter over low heat. Slowly sift the flour in and whisk it all together. You'll have some buttery balls when it's combined together. Let this cook for about 45 seconds (otherwise your cheese sauce will have a chalky taste)

  3. Slowly add in the milk and whisk like you've never whisked before. I initially take the pot off the eat because the first few tbsps of milk just evaporate... keep adding and whisking until all you have a creamy, thick consistency (your milk will vary at this point)

  4. Add in your cheese, one handful at a time. I turn off the heat for this because if your roux is too hot, your cheese can curd (this usually happens with cheddar cheese but still). Once the first handful is incorporated, put back on the eat and don't forget to keep whisking! If it's too thick, add some milk and this will help loosen it up.

  5. Moving on to the chicken and/or tofu strips. Season them with grill seasoning and heat up 2 tbsp (about 2 turns of the pan) of EVOO. Place strips in and cook until chicken is done or the strips have a nice light golden color

  6. Now the fun part! The assembly! Place your pizza crust in a baking pan or pizza stone. Sprinkle red crushed pepper flakes on your pizza crust, spread broccoli, sun-dried tomatoes and the cubes of meat on the pizza

  7. Pour cheese sauce on top! Ooey-gooey goodness gracious! Yum! (Be careful not to go over-board like I did b/c it well make your crust smooshy)

  8. Place in over for about 15-20 minutes

Any left over the cheese sauce can be used for a fun fondue night or as a spread... but really? Do you need an excuse to just eat cheese? Go ahead.. grab a spoon and eat it out of the pot... No one is judging you :)


Wednesday, September 2, 2009

Tomato Basil Pesto Pasta


Mama Mia... Papa Pia... How I love pasta... This past Saturday morning, I was lounging around flipping between Food Network and HGTV (whatever happened to Saturday morning cartoons??) and I started watching Sunny Anderson make this delicious tomato pesto. I thought "Well that's a great alternative to the usual marinara sauce!" Luckily I had most of the ingredients on hand and it came to be a delicious dinner last night!

What you'll need:
10-15 cloves of garlic (OR 3 tbsp of pre-minced garlic from a jar)
1/2 cup EVOO (extra virgin olive oil)
1 lb cherry tomatoes (or plum tomatoes... I actually used 3 Roma tomatoes and it was fine)
1 cup of fresh basil leaves
Linguine, fettuccine or spaghetti
2 tbsp of pine nuts, toasted (this may be hard to find, Whole Foods sell them in their bulk section)
1/4 cup grated Parmesan cheese
Salt and Pepper
Tomato Sauce (optional)
Red Crushed Peppers, toasted (optional)

The "How to":
1. Preheat oven to 375F
2. Place garlic in a single layer in a small baking dish. Add 1/2 cup olive oil to cover cloves, cover with foil, and bake 45 minutes, until golden brown and fork-tender.
a. If you are using the pre-minced garlic like I did, then spread them into a thin layer and spray them with cooking spray and cover with foil
3. In another baking dish, toss tomatoes with enough oil to coat. Roast at same temperature until tomatoes blister, about 25 minutes (you’ll see the skin of the tomato split)
4. Put your pasta to boil – follow the instructions on the pasta box
5. While the tomatoes and garlic are roasting, place the pine nuts and red crushed pepper (optional for heat) in a saute pan. Toss occasionally, until the pine nuts start goldening
6. Once garlic and tomatoes are ready, strain garlic cloves and put them in the blender along with the tomatoes. Reserve the olive oil from the garlic for straining or you could make a yummy salad dressing!
7. Add basil, parmesan, salt, pepper, pine nuts and red crushed pepper to the blender.. Pulse until combined. While machine is running, drizzle in 1/2 cup olive oil until pesto comes together. If you feel like the sauce is too chunky, add in the tomato sauce until it becomes the consistency you want.
8. Add in seasoning and extra cheese if needed and blend


So incredibly yummy and I didn’t even need to add extra cheese on top! There will be leftover pesto, use it as a bread dip!

Enjoy!!

Tuesday, August 18, 2009

Classic Favorite: Mac N Cheese


Sometimes you just need a trip down memory lane with some classic comfort foods. I had a craving for Mac N Cheese but seeing how the days of "Macroni Express" are behind me, I thought I'd make my own.

What you need:
2 cups of macaroni elbows
2 cups of broccoli florets
1 cup of mozzarella cheese, shredded
Assorted other cheeses like asiago, parmesan
salt and pepper to taste
3 tbsp butter
3 tbsp flour
3 cups of milk (perferbbly 2% or whole)
pinch of cayenne
1 cup stock (chicken or vegetable, whatever you have on hand)


The "How to":
1. Boil a pot of water for the macaroni elbows, once it's at a boil, salt for seasoning (optional) and add in your pasta
2. After 10 minutes, add in your broccoli so it can cook as well
3. Heat a medium pan over medium heat on your stove top
4. Add in butter and once melted, add in flour and cayenne and whisk quickly to combine, this creates a roux (make sure you don't over cook because it'll leave the cheese tasting chalky later)
5. Add in milk and stock
6. Let sauce thicken (should take about 5 minutes)
7. Remove one cup of starchy pasta water and reserve for cheese sauce to come
8. Drain out pasta and broccoli and leave to the side for a moment
9. Add in your cheese and keep folding together until all is well blended
10. If the sauce is too thick and hard to mix, add a little bit of starchy water until it's at the consistency you want it
11. Add in your pasta and broccoli, combine well
12. Adjust seasoning as need


Voila! Mac and Cheese the grown up way :)

Taco Salad Madness


If you know me, you know I love my Tex-Mex. It would be the one cuisine I'd want to be stuck with eating if I absolutely had to.. one of those "if you were stuck on a deserted island" sort of things... Getting to the point.

I was clicking around and stumbled on a quick easy way to make taco salad shells. I thought what the heck! Let me try it...

What you need:

foil
Cooking spray
4 Large flour tortillas (I bought mine and the trick doesn't work as well with wheat tortillas)
1 can of Black beans
2-3 tomatoes, diced
1 green bell peppers, diced
1/2 small white or red onion, diced
Salsa
Taco seasoning
Cheese
Spinach or lettuce, shredded
2 tbsp Lemon Juice
Salt and pepper to taste
1/2 unripened mango, diced
The "How to":

Mango Pico de Gallo
1. Combine tomatoes, onions, green onions and mango in a small bowl
2. Add in lemon juice and swish around
3. Drain excess lemon juice
4. Add salt and pepper to taste
5. Refriderate until ready to eat

Taco Salad:


1. Pre-heat oven to 350
2. Create 2 4 in boil of foil OR cover a large container with 2 layer of foil (Essentially you will be laying the tortilla on top and the heat will cause it naturally frame this object)
3. Place the foil balls on the baking tray
4. Spray one side of the tortilla with cooking spray and lay the NON-spray side one the foil ball and repeat for the second one
5. Bake in oven for about 15-20 minutes or until the tortilla starts to golden
6. Repeat depending on how many shells you need


Black Beans:

1. open can of beans and mix a little salsa and taco seasoning in
2. eat beans in microwave

Now the fun part! The assembly of the Taco Salad

1. Take your shell and layer the bottom with spinach
2. Add beans, then your cheese, mango pico de gallo and all your other Mexican condiment staples (sour cream, guacamole, jalenpenos, etc)
3. Take a fork and have at it!
The tortilla shell is really light and flaky and the best part is that it doesn't have any added oil! Got great reviews from my two favorite taste testers too!

Enjoy!!

I heart cheesecake!


I love meeting new people... anyone that knows me can atest to that. When the husband came home and said "hey! we've been invited to my co-worker's house for dinner," I jumped at the opportunity to make dessert.

I wanted to make a cheesecake and yay! the couple loves cheesecake.. meant to be I tell you :)

Kraft makes cheesecake making super easy so I can't take full credit for this but I hope you enjoy!

Blackberry Swirl Cheesecake

What you need:
1 8x11 cooking pan
Foil
Hand mixer

Crust:
1 cup of graham cracker crumbs
3 tbsp of sugar
3 tbsp of butter, melted

Filling:
40 oz of cream cheese (I used 5 - 8 oz packages of fat-free Philadelphia cream cheese)
1 cup of sugar
3 tbsp of flour
1 tbsp of vanilla
1 cup of sour cream
4 eggs

Topping:
1 cup of seedless jam, softened

The "How to" from Kraft Kitchens:

Making the crust:
1. Heat oven to 325°F.
2. Line 13x9-inch pan with foil, with ends of foil extending over sides
3. Mix cracker crumbs, 3 Tbsp. sugar and butter
4. Press onto bottom of pan. Bake 10 min and leave oven on for the next step

Making the filling:
1. Make sure your cream cheese is room temperature or heat it in the microwave for about 20 seconds.
2. Beat cream cheese, 1 cup sugar, flour and vanilla in large bowl with mixer until well blended.
3. Add sour cream; mix well.
4. Next, we're going to add the eggs but make sure you do this 1 at a time, mixing on low speed after each just until blended.
5. Pour over crust and spread evenly
6. Melt your jam into a liquid and gently drop globs of jam over batter
7. Swirl with knife for a fun marbling effect
8. Place a smaller baking pan fill 1/2 way with water on the bottom rack. This will help the cake from cracking
9. Bake for 40 min. or until center is almost set. When you take the cake out, the frame should be firm and the center should be jiggly
10. Cool completely and then place in refrigerator for at least 4 hours.
11. Lift cheesecake from pan with foil handles before cutting to serve.


Fun "Meat"ball Subs!

After a very long hiatus, I'm back! Did you miss me? :)
So in our latest "let's be healthy" kick, my hubby ventured out to Newflower Market and found Gimme Lean Meatless Sausage.


Now, I'm not usually a fan of fake meat but, what the heck... maybe we can make something yummy :)

A quick search on allrecipes.com and recipezaar.com and I came up with this:

Sweet Tomato "Meat"ball Subs:

What you need for the meatballs:


3 tbsp water
3 sun-dried tomatoes, finely chopped
14 oz. Gimme Lean Beef Substitute (you can use ground beef or chicken as well)
1/4 onion, finely chopped onions
1/2 cup bread crumbs
1/4 cup 2% milk or whole milk
1/2 tbsp garlic paste (just chop garlic and smush it with salt)
salt and pepper to taste
1 tsp of rosemary
1 tsp of chili powder
1 pound ground beef
pinch of cumin powder
1 egg white (optional)

Sub rolls and provolone cheese to come later


The "to do":

1. Preheat your oven to 325

2. Chop the sun-dried tomatoes and combine them with 3 tbsp of water. Cook until all the water has evaporated

3. Combine the onions, "beef", milk, tomatoes, garlic, spices, bread crumbs and egg white in a bowl. Make sure it mixed together very well.

4. Form the mixture into golf-size balls and place on a non-stick baking tray. When done, pop them into the oven until they are a nice golden color. Should take about 25 minutes

Tip: If you are still getting used to the taste of fake meat or like your meatballs to be a bit more moist, add a couple of tbsps of ricotta cheese.

Next the Sauce.


What you need:

(This is really a hodge podge of veggies so pick and add as you like!)

2-3 tbsp of olive oil

1 16 oz can of tomato sauce

8 oz of diced tomatoes

1/4 white onion (if large), 1/2 if it's a medium to small onion, chopped

1 stem of green onion, chopped

1 small green bell pepper, chopped

4 oz of mushrooms, chopped

2-3 cloves of garlic, minced

red crushed peppers, salt, pepper to taste

1 pinch of rosemary

3-4 leaves of basil, torn into small pieces


The "to do":

1. Heat oil in a sauce pan and saute onions, garlic first and let them get a bit soft first

2. Add in mushrooms and bell peppers and whatever else you want (zucchini, squash, etc)

3. add in your spices and let this cook for a bit till all the veggies r soft

I like my sauce to be smooth over chunky so if you like it chunky, just add in your tomato sauce and diced tomatoes at this point and let it come to a boil

If you like it smooth like me, keep going...

4. Add the tomato sauce, diced tomatoes, sauteed veggies to a blender and pulse chop to get it all mixed up before you hit blend

5. Pour sauce back into the sauce pot and let it come to a boil. Make sure you taste it to see if the spices are to your taste!


Last but not least, the coming together of the incredible sub!

1. Slice your roll in half and remove some of the excess bread from the middle of one of the sides, essentially creating a "boat" in the middle of the bread

2. Assemble a slice of cheese (I used provolone and mozzarella) on one side of each of your your sub roll and place into the oven (make sure your meatballs are out!)

3. After about 5-7 minutes, the cheese should be melted and the bread nice and toasty

4. take 2-3 meatballs and drop them into your sauce and scoop them into the pocket you created on one side of your sub

That's it!! So yummy! Enjoy!

Wednesday, December 17, 2008

Pumpkin Cake


This recipe caused me to live true to my husband's nickname for me - "Hurricane Piyusha." Though I rarely bake, this turned out soooo good :) Thank you chow.com!

Ingredients:
  • 4 cups cake flour
  • 1 1/4 tablespoon baking powder
  • 2 1/4 teaspoons ground cinnamon
  • 2 1/4 teaspoons ground ginger
  • 1 teaspoon freshly grated nutmeg or nutmeg powder
  • 1 teaspoon salt
  • 2 cups canned pumpkin purée
  • 1 cup milk (1%-whole is good)
  • 2 sticks (8 ounces) unsalted butter, at room temperature
  • 2 cups packed light brown sugar
  • 4 large eggs, at room temperature
  • 2 teaspoons vanilla extract

The "How to" -


  1. Heat the oven to 350°F and arrange the rack in the middle and place the cupcake liners in your pan (or whatever baking dish you are going to use)

  2. Sift together dry ingredients in a bowl and set aside
    Whisk together pumpkin and milk in a separate bowl and set aside

  3. With a mixer or in the bowl of a stand mixer fitted with a paddle attachment, beat butter and sugar on high speed until light and fluffy, about 5 minutes
    Add eggs one at a time

  4. Add vanilla and beat until smooth

  5. Add dry ingredients in three batches, alternating with pumpkin-milk mixture, mixing on low speed

  6. After all ingredients have been added, mix batter 30 seconds on medium-high speed until uniformly combined.
    Fill the cupcake liners 3/4 full with batter and bake

  7. Check to see if cupcake are done by poking one in the middle and seeing if the toothpick comes out clean

  8. Remove cupcakes from the oven and allow to cool 5 minutes before removing from the pans

  9. Let cool completely on a rack, decorate with icing


Icing:


Ingredients:


  • 8 oz container of cream cheese

  • 1/2 cup sugar

  • 2 tbsp of vanilla extract


The "how to" -


1. soften cream cheese to room temperature and mix in all ingredients


2. spread on to pumpkin cake


Sweet Basil Thai Curry


· 1 can of baby corn, sliced in half
· 1 green bell pepper, seeded and cut into strips
· 1 small red onion, cut into thin strips
· 1 can of coconut milk
· 1 cup of chicken or vegetable stock
· 1 tbsp of olive oil
· Chili sauce
· 3 tbsp of soy sauce
· 3 tbsp of rice wine vinegar
· Red pepper flakes
· 2 tbsp of shredded ginger root
· 1 container of tofu, cubed (can use chicken instead)
· 2 tbsp of garlic, minced
· 3 green onions, chopped
· 1 cup of fresh basil leaves, torn into pieces

The “How to”:
1. Pre-heat oven to 350° and place cubed tofu in a pan. Bake until tofu is spongy and no longer “wet” (about 10 minutes)
2. In a large skillet, or wok, heat oil
3. As oil is heating, mix coconut milk, soy sauce, rice wine vinegar, red pepper flakes – set aside
4. In wok, add in ginger, onions and garlic, let cook for 5 minutes and then add in corn and bell peppers, chili sauce and green onions
5. Add in coconut milk that you had set aside earlier
6. Let the coconut milk reduce into a thick, creamy consistency
7. Add in the cup of stock to loosen up the consistency and make it more into a curry
8. Stir in tofu
9. Let cook for 5 minutes before adding in the basil

Green Bean and Potato Indian Curry

Indian cooking is a bit tricky... you have to find the delicate balance between multiple spices and then there's a pressure cooker involved! Needless to say, I think I'm one step closer to making food just like my dear Mummy :)
· ½ pound of green beans, cut into 1” pieces
· 2 small-medium potatoes, peeled and diced
· 1 small tomato, diced
· ½ tbsp of salt
· ½ tbsp of dhana jeeru (or cumin)
· ¼ tbsp of turmeric
· ½ tbsp of chili powder
· 1 cup of Water
· ¼ tbsp of mustard seeds and fennel
· 1 tbsp of oil (or one turn of the pot)
Note: I used a pressure cooker but if you don’t have one on hand, a normal pot will do

1. Heat oil in the pressure cooker, not too hot! Low-medium heat
2. Add in the mustard seeds and fennel
3. When the mustard seeds start to crack and pop (watch out because they do fly!), add the tomato pieces. Make sure that it isn’t too too hot
4. Once the tomatoes become a mush, add in potatoes and green beans
5. Add in the spices… again this is a delicate balance so do it according to your taste buds
6. Stir everything together to make sure that the potatoes and green beans are well coated
7. Add in water
8. Now if you’re doing this in a pressure cooker, let 2-3 whistles blow. If you are doing this in a pot, let it cook until the potatoes are done. If you need to add more water or want more gravy add a little bit more water and some powdered instant mashed potatoes.

Serve with white rice or rotlis (or wheat tortillas)


Ode to La Madelline..


How I love thou's tomato basil soup... I walked into the work kitchen one day and it smelled like La Mad!! I had to ask for the recipe!!

Ingredients:

- 1 tablespoon olive oil (or a turn of your pot)
- 1 medium sweet onion, chopped
- 1 15 oz. can of diced tomatoes
- 1 15 oz. can of whole, peeling tomatoes
- 3 cups vegetable or chicken stock
- Salt and freshly ground black pepper
- 1/2 cup fresh basil, torn
- 3 tablespoons of light cream cheese
- 1 medium size clove of garlic

The "How to":

1. heat the oil in your pot (you're going to need a big one!), add in garlic and onions and sautee till onion is clear
2. add in both cans of tomatoes
3. season with salt and pepper (you can add crushed red pepper if you want more heat)
4. add in stock
5. add in cream cheese
6. let cook together and watch that the cream cheese is melting

To make the soup a more smoother consistency, I blended 3/4 of it and add it back to the pot


Easy, peezy!


Tuesday, September 30, 2008

The Famous Mexican Lasagna


Now most of you know (and love me for) my mexican lasagna... it's become quite the staple in answering "what should I make tonight?" questions :) So yes... I am finally going to share the recipe beyond my 3 fabulous college roommates and even include the secret ingredient.

What you need:

- 1 green bell pepper, diced
- 1 or 2 Roma tomatoes, seeded and diced
- 1 small to medium white onion, diced
- 1 can of refried beans
- 1 cup of salsa
- 1 cup of spaghetti sauce (the secret ingredient!)
- 1 tbsp. of taco seasoning (optional)
- 1 lb. pre-shredded Mexican blend or cheddar cheese
- 1 packet of tortillas (small or medium in size)
- baking dish about 2-3 inches deep

The "How to":

  1. pre-heat oven to 350
  2. mix all the veggies (tomatoes, green peppers, onions) together in a bowl, set aside
  3. mix refried beans, salsa, spaghetti sauce and taco seasoning in a bowl... adjust sauces depending on how saucy you want it
  4. thinly layer the bottom of your baking dish with salsa
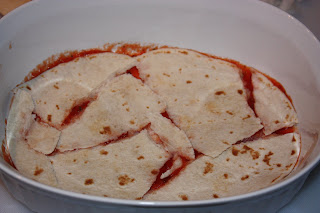
  5. tear and arrange tortillas on the bottom of the pan

  1. layer as follows: bean mix, cheese, veggies, tortilla (and so on till you reach the top)
  2. on the top layer have plenty of cheese
  3. cover baking dish with foil and place in oven
  4. dish done once top layer of cheese melted

SOOOOOO GOOOODDDDD

Sunday, September 28, 2008

Palm-size Pies!

If you're having a bunch of people over for that odd time of after-dinner but still too early for just coffee or drinks, why not make mini pizzas!


What you need:

  • pizza dough
  • pizza sauce (recipe below)
  • cheesa (I used cheddar)
  • Pizza toppings
  • Baking pan
  • Olive oil
  • 1 clove of garlic

(ok fine, I cheated and bought dough from Jimmy's (www.jimmysfoodstore.com) which is an awesome little Italian grocery store in Dallas)

The "How To":
  1. Pre-heat oven to 350
  2. Roll out dough into 3 inch diameter pies. Using flour helps to keep it from folding back
  3. In a bowl, pour olive oil (about 1/4 inch high) and put the smashed, whole cloves of garlic in the bowl. Heat in microwave for 25 seconds
  4. Spread oil over the mini dough pies and put in oven for 10 minutes (until they puff up a little bit)
  5. Take the pizzas out and spread the pizza sauce and top with cheese and toppings
  6. Place back in over and heat until cheese is melted

Pizza Sauce -

What you need:

  • 3 tbsp. tomato paste
  • 2 cloves of garlic, minced
  • 1 can tomato sauce
  • Spices: onion or garlic powder, oregano, basil, black pepper, salt, sugar, red crushed pepper

The "How to":

  1. Combine all the ingredients together in a bowl
  2. Let sit before spreading on the pizza to allow flavors to combine

Why Hello there... Have you been eatened?


Chocolate Mascarpone Cake (courtesy of Chow.com)
This dessert looks really hard to make is actually really easy... and the best part is that it's a no bake!

What you need:
  • 2 cups heavy cream
  • 1/4 cup sugar
  • 1 tbsp. of vanilla or 2 tbsp. of imitation vanilla
  • 1/4 cup of blackberry liquor (optional) or fresh berries (I used blue berries)
  • 2 tbsp of unsweetened cocoa powder
  • 1 8 oz. container of mascarpone cheese (find at an Italian grocery store or Central Market)
  • 1 box of chocolate graham crackers

Equipment: mixer, spatula, platter or a springform pan or really whatever you have to make this in

The "How to":

  1. Combine the cream, sugar, vanilla, liquor and/or berries, cocoa powder and mascarpone cheese in a mixing bowl. Mix on medium speed until mixture becomes thick
  2. start layering the graham crackers in your pan and then the cream mixture. Alternate the layers until you reach the top
  3. Cover and place in fridge for 4-5 hours

I'll admit this one made quite the mess in the kitchen... there was a "uhm where did the sink go?" moment. Next time, I'll post a picture of Hurrican Piyusha and the deadly kitchen disasters!